

| Prev | User's Guide | Next |
Exporting/Importing Data
Pervasive.SQL provides an ODBC interface, which makes it easy to access your data from a large number of third-party programs. Sometimes data must be made available in other ways or in specific formats. To ease the migration of data to and from Pervasive.SQL databases, Pervasive Control Center (PCC) includes import and export wizards.
The Import/Export wizards in PCC support two different data formats, which can be read and written. The formats are shown in Table 3-5.
An empty string is designated in exported format by double quotes. A column defined as nullable and that contains a NULL is designated in exported format by two commas (two field separators) together.
Export and Import Procedures
This section describes the procedures used to export or import data from or to Pervasive.SQL.
To export data from a Pervasive.SQL database table
- Select the Tables node in the namespace under the database from which you are exporting data.
- Right-click on the desired table object in the table list in PCC's right pane.
- Select Tasks, then Export Data from the shortcut menu.
- Enter the location of the output file that you want to contain the records exported from the table.
Figure 3-22 Export Wizard - Choose a Destination File Dialog Box
This example exports comma delimited records.
Select the box marked Write column names at first row if you would like the Export Wizard to create a header row at the beginning of the file that includes the name of each column from the DDF. This would be particularly useful if you are exporting to another application, such as Excel, so that the contents will be identified.
- Click Next. The Export Wizard now displays a dialog box that allows records to be filtered or processed using SQL. The option chosen here is to output the table records unmodified.
Figure 3-23 Export Wizard - Specify Table Copy or Query Dialog Box
- Click Use SQL statement for export if you would like to filter the output records using SQL (Figure 3-24).
Click the Export from table if you want to export the entire table without specifying any filters.
Figure 3-24 Export Wizard - Use SQL Statement for Export Dialog Box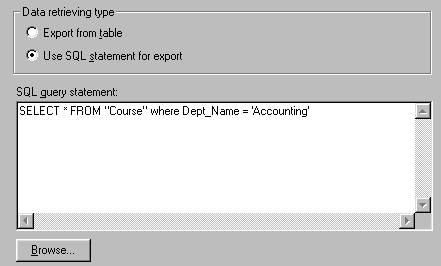
- Click Next. Now that all of the information has been entered, the Export Wizard displays a dialog box listing the actions to be taken.
Figure 3-25 Export Wizard - Completing the Export to the File Wizard Dialog Box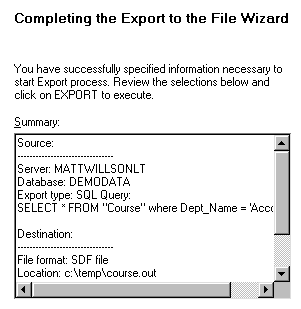
- Click Export. A dialog box provides feedback as the records are exported from the table. Once all records are processed, the Finish button becomes enabled. Click it to exit the wizard.
Tip
If the export fails because of invalid data, you can troubleshoot the record that contains the invalid data. Click Abort on the error message, then No on the message that asks if you want to delete the partially exported file. Open the partially exported file in an editor. The last record in the file is the record containing the invalid data.
Figure 3-26 Exporting Data Status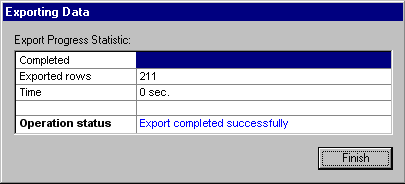
To import data into an existing table
You designate an empty string by using double quotes. You designate a NULL by using two commas (two field separators) together. For example, the following table shows how you would designate a "middle initial" as an empty string and as a NULL, respectively.
- Click on the Tables node in the Namespace under the database into which you are importing data.
- Right-click on the desired table object in the table list in the Control Center's right pane.
- Select Tasks, then Import Data in the shortcut menu.
- Enter the location of the file that contains the data to be imported into the table. Also indicate the format of the data.
Figure 3-27 Import Wizard - Choose a Source File Dialog Box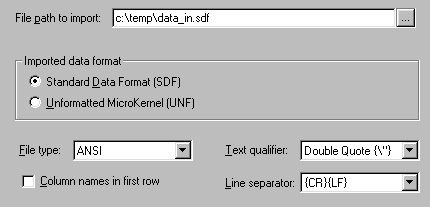
Select the box marked Column names at first row if you selected the option Write column names at first row when exported the file (Figure 3-24).
- Indicate what should be done to the data as it is imported. The options are to import all of the data and insert it into the table or to specify an SQL statement, which gives you control over how the import data fields correspond to the columns in the table.
Figure 3-28 Import Wizard - Specify Table Copy Dialog Box
- Alternatively, you can click Use SQL statement for import if you would like to use a SQL statement to control how the import file columns correspond to the table columns. In the example shown in Figure 3-29, the question marks (?, ?, ?, ?) represent the fields from the source file.
Select Import into table if you selected the option Export from table (Figure 3-25) to import the entire table without filters.
Figure 3-29 Import Wizard - Use SQL Statement for Import Dialog Box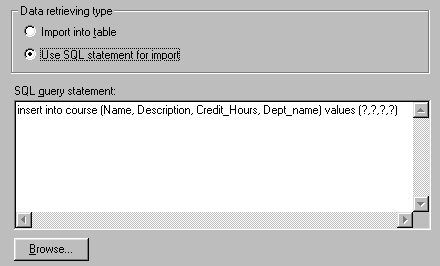
You cannot import fewer fields than exist in the table or in the import file. Both the import file and the table must have the same number of columns. The only factor you can control with the INSERT statement is how the import file columns correspond to the table columns.
The first named column receives the data from the first column in the import file, the second named column receives the data from the second column in the import file, and so on.
For example, if you want the data in the first column of the import file to go into the third column of your table, you must put the name of the third column first in the column list.
- Now that all of the information has been entered, click Next. The Import Wizard displays a dialog box listing the actions to be taken.
Figure 3-30 Import Wizard - Completing the Import from File Wizard Dialog Box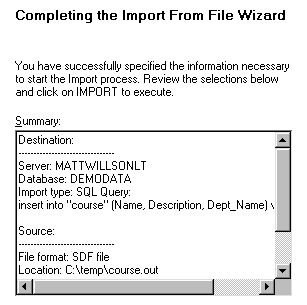
To stop the import, click Cancel, or else click Import.
- A dialog box provides immediate feedback as the records are imported into the table. Once all records are processed, the Finish button becomes enabled. Click it to exit the wizard.
Figure 3-31 Importing Data Dialog Box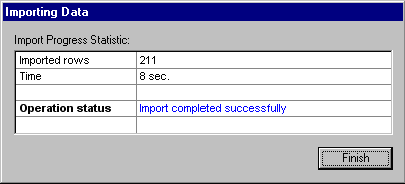
To import specific columns of an SDF file into a table using the import wizard
In some cases you may wish to import only some of the columns in a table into a new table. Using an example, this procedure explains how to do it.
- First, assume we are starting with an export table that was created with the following statement:
CREATE TABLE Customer (FirstName char(10),LastName char(10), Telephone char(12), AmtOwed currency)INSERT INTO Customer VALUES ('Alexi', 'Pruneda', '512-264-9999', 1200.69) INSERT INTO Customer VALUES ('Matte', 'Pruneda', '512-264-9999', 9999.69)Next, assume that the following statements were executed to insert sample data:
- Now assume the import table was created with the following statement:
CREATE TABLE phonelist (FirstName char(10),LastName char(10), Telephone char(12))Notice that this table does not have all the columns of the original one.
- Using the following query in the Export Wizard, export the data from the original table into an export file named
cust.sdf:SELECT * FROM CustomerNote that the export file contains four columns:
"Alexi","Pruneda","512-264-9999","1200.69" "Matt","Pruneda","512-264-9999","9999.69"- Using the Import Wizard, import the data from the SDF file into the new table.
- To start the Import Wizard from PCC, select the Tools menu and choose Wizards4Import Data.
- In the Import Wizard, in the box labelled File path to import, select cust.sdf (the file that you used to export the values). Then click Next.
- Choose Use SQL statement for import.
- In the query window, type this query:
INSERT INTO phonelist(FirstName,LastName, Telephone) VALUES (?, ?, ?)The named fields must be in the same order as the fields listed in the
CUST.SDFfile. The named fields do not need to be in the same order as they exist in your destination table. You can move the column names in the INSERT statement around as necessary to correspond properly with the fields in the SDF file. Click Next.Notes
The import process can exclude any number of fields at the end of each record, but it cannot exclude any fields at the beginning or middle of a record. As in the example above, the SDF file contained 4 fields, but we imported only the first 3 by including only 3 question marks in the VALUES clause. You may not exclude beginning or middle values from the SDF file, as in
VALUES ( ,?,?,?)orVALUES(?, ,?,?). These syntax forms generate error messages. If you need to achieve this effect, then you should use a SELECT statement during your export process to generate an SDF file that contains only the columns you want to import into your other table.The process is simpler if you are exporting and importing the same number of fields to and from the SDF (standard data format) files. Then the SQL queries are not necessary, and you can choose to export and import the full table.
If the export and import tables are part of the same database, importing can also be done using SQL queries. The following example would achieve the same results as the steps listed above:
INSERT INTO phonelist (FirstName, LastName, Telephone)
SELECT FirstName, LastName, Telephone FROM Customer
| Prev Viewing and Modifying Data |
Contents Up Check for Revisions | Next Checking Consistency and Referential Integrity |