
| Prev | User's Guide | Next |
Adding a Table
Tables are the objects in which databases store data. PCC's Create Table Wizard enables you to easily add and remove tables from any existing database. (You may also add a table with Table Designer. See Table Designer .)
Note
To create a table in a database, database security must be turned off or you must have access rights to create tables.
Caution
It is highly recommended that you backup all your DDFs and data files before you perform functions through Table Designer. That tool lets you modify your database schema and data. If you inadvertently set the options incorrectly or enter incorrect data, you could change your files in an irreversible manner. Full recovery will be possible if you have performed a backup.
To create a new table within a database
- Click on the Tables Namespace node beneath the database in which the new table is to be created.
- Right-click on the background in the table list in the right pane of the Control Center window or right-click on the "Tables" icon underneath a given database icon.
- Select New Table from the shortcut menu. The following dialog box appears:
Figure 3-10 Create Table Wizard Dialog Box
Enter the name of the new table. Click Next when done.
For advanced users only: you may select the Use advanced settings box in order to create a table definition for an existing Btrieve file. The steps to use this advanced option are described in Advanced Operations Guide, Adding Relational Access to Btrieve Files .
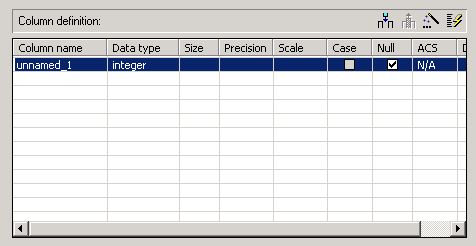
- The columns that are to appear in the new table must now be defined. The following dialog box presents a grid display in which columns may be defined:
Figure 3-11 Create Table Wizard - Designer View Dialog Box
Create Table Wizard Design Buttons
Use the design buttons (located at the right of the window) for ease in creating a table. Their functions are described in Table 3-3.
Create Table Wizard Column Attributes
Name
Enter an alpha-numeric name for the column. The limit is 20 characters. You can have spaces in the name, but if you have spaces, you must always enclose the name in quotes whenever you are referring to it in SQL statements. Avoiding the use of spaces is recommended.Data Type
Choose a data type for the column.Size
For character or binary fields, specify how many bytes are permitted in this field.Precision
For floating point values, specify the number of significant digits.Scale
For floating point values, specify the number of significant digits that are to the right of the decimal point.Case
For character data types, checking the Case attribute forces the database engine to use case-insensitive comparisons when searching for values in the database.Null
For data types that allow NULL values (IDENTITY and BIT data types cannot be null), checking the Null attribute permits NULL values in the column.ACS
If you wish to use an alternate collating sequence (ACS) for this column, specify the path name to the ACS here.Default
If you wish to specify a default value for this column, enter the value here. The default value is used if a row is inserted and no value is provided for this column.
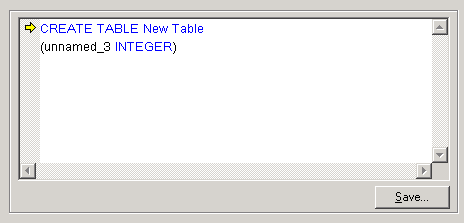
- The next dialog box (Figure 3-12) displays the SQL statement that could be used to recreate this table at a later date. This statement can prove useful in replicating a database structure at another location, or as a safety measure in case the table must be re-created.
Figure 3-12 Create Table Wizard - Generate SQL Script Dialog Box
- You can click the Save button to save the script so that it can be run in the Pervasive.SQL data manager at any time. Click Next.
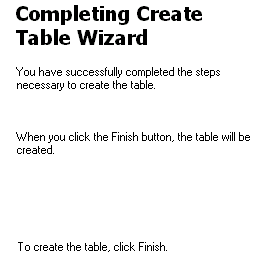
- By clicking Finish in the dialog box below (Figure 3-13), the changes that have been entered thus far will be committed to the database.
Figure 3-13 Create Table Wizard - Complete Dialog Box
- The wizard displays a final dialog box (not shown) indicating that the operation was a success. Click Close.
Creating Tables for Existing Data Files
Sometimes a data file already exists, but it has no table definition allowing it to be accessed with ODBC. The advanced settings of the Create Table Wizard allow for adding table definitions for existing data files. For detailed instructions on how to perform this complex procedure, see Advanced Operations Guide.
| Prev Deleting a Database |
Contents Up Check for Revisions | Next Dropping a Table |